Before
What’s not to love about a toy chest made by you with a secret LEGO drawer? Follow the steps from The Stump Shop, M Inspired Living and Remarkable Woodworks to build your own.
Cut List
- Chest Pieces:
- Bottom: 33 x 19”
- False Bottom: 33 x 19”
- Top: 5 – 1 X 3 ½ X 27” & 1 - 1 X 2 X 37”
- Long Sides: 12 – 1 X 3 ½ X 36”
- Short Sides: 12 – 1 X 3 ½ X 17 ¼”
- Supports: 4 – 2 X 2 X 16 ¾”
- Drawer Pieces:
- Bottom: 28 ½” x 10”
- Long Sides: 2 - 1 x 2 7/8 x 29 ¾”
- Short Sides: 2 - 1 x 2 7/8 x 10”
- Supports: 4 - 2 X 2 X 3”
- Lid Pieces:
- Lid: 5 – 1 x 3 ½ x 37” & 1 – 1 x 2 x 37”
- Support: 1 x 3 ½ x 16”
Step 1: Cut all wood to size, as outlined in the cut list.
Pro Tip: If you’re not comfortable or don’t have the space for ripping sheets, ask a lumber associate to do it for you! It’s free in most big box stores.
Building the Chest
Step 2: Assemble base of false bottom.
- Stand support pieces up on each corner of the chest’s bottom piece. Glue and brad nail in place
- Lay the top piece on the support pieces. Glue and brad nail in place.
Step 3: Assemble sides
- To create the first row of the chest, attach one long and three short side pieces to the edges of the plywood bottom with glue and brad nails. Leave one long side open – this will be the drawer front.
- Stack the second row of side pieces on the first row and against the false bottom piece, securing with glue. Brad nail the second-row long piece in place, above the gap left for the future drawer. Use the future drawer front piece as a spacer.
- Glue and nail the four support pieces into every corner of the second row.
- Continue stacking long and short side pieces until the chest is 6 rows tall, securing with glue and brad nails.
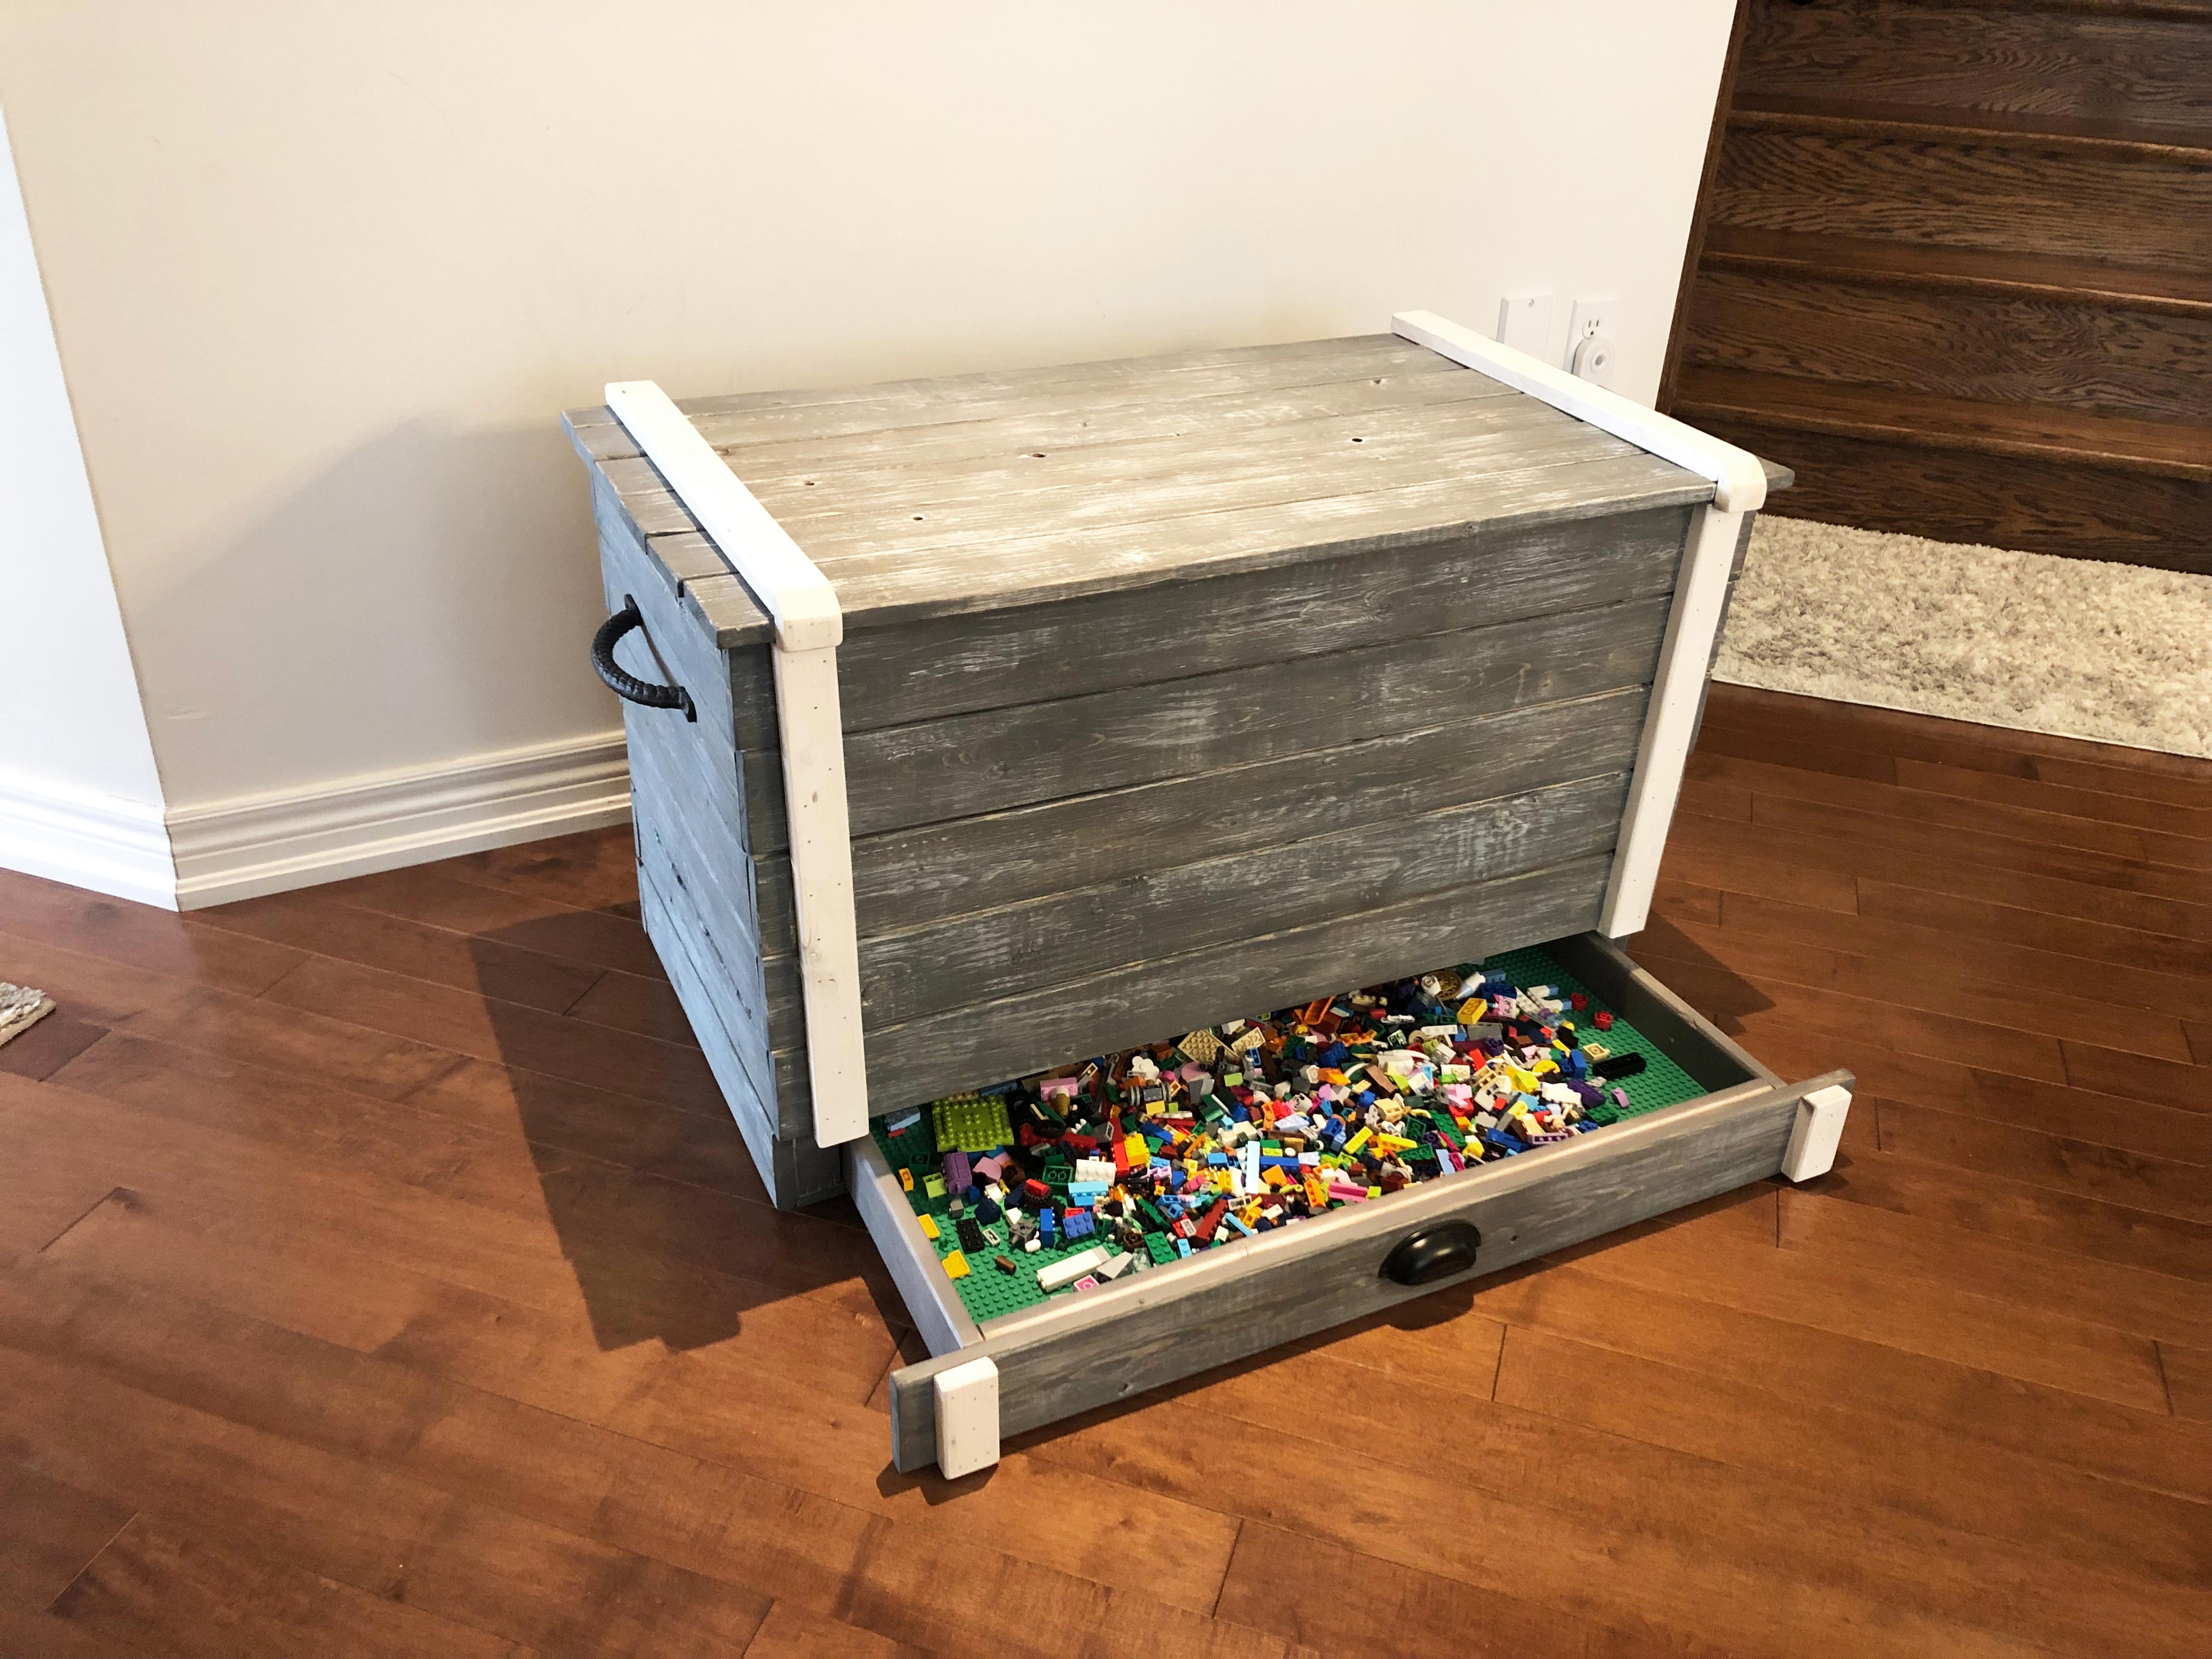
Building the Drawer
Step 4: Assemble base and sides: Stand long edges of long and short side pieces up on the bottom piece of the drawer. Glue and brad nail in place.
Step 5: Glue two LEGO boards to the bottom of the drawer.
Step 6: Attach drawer handle.
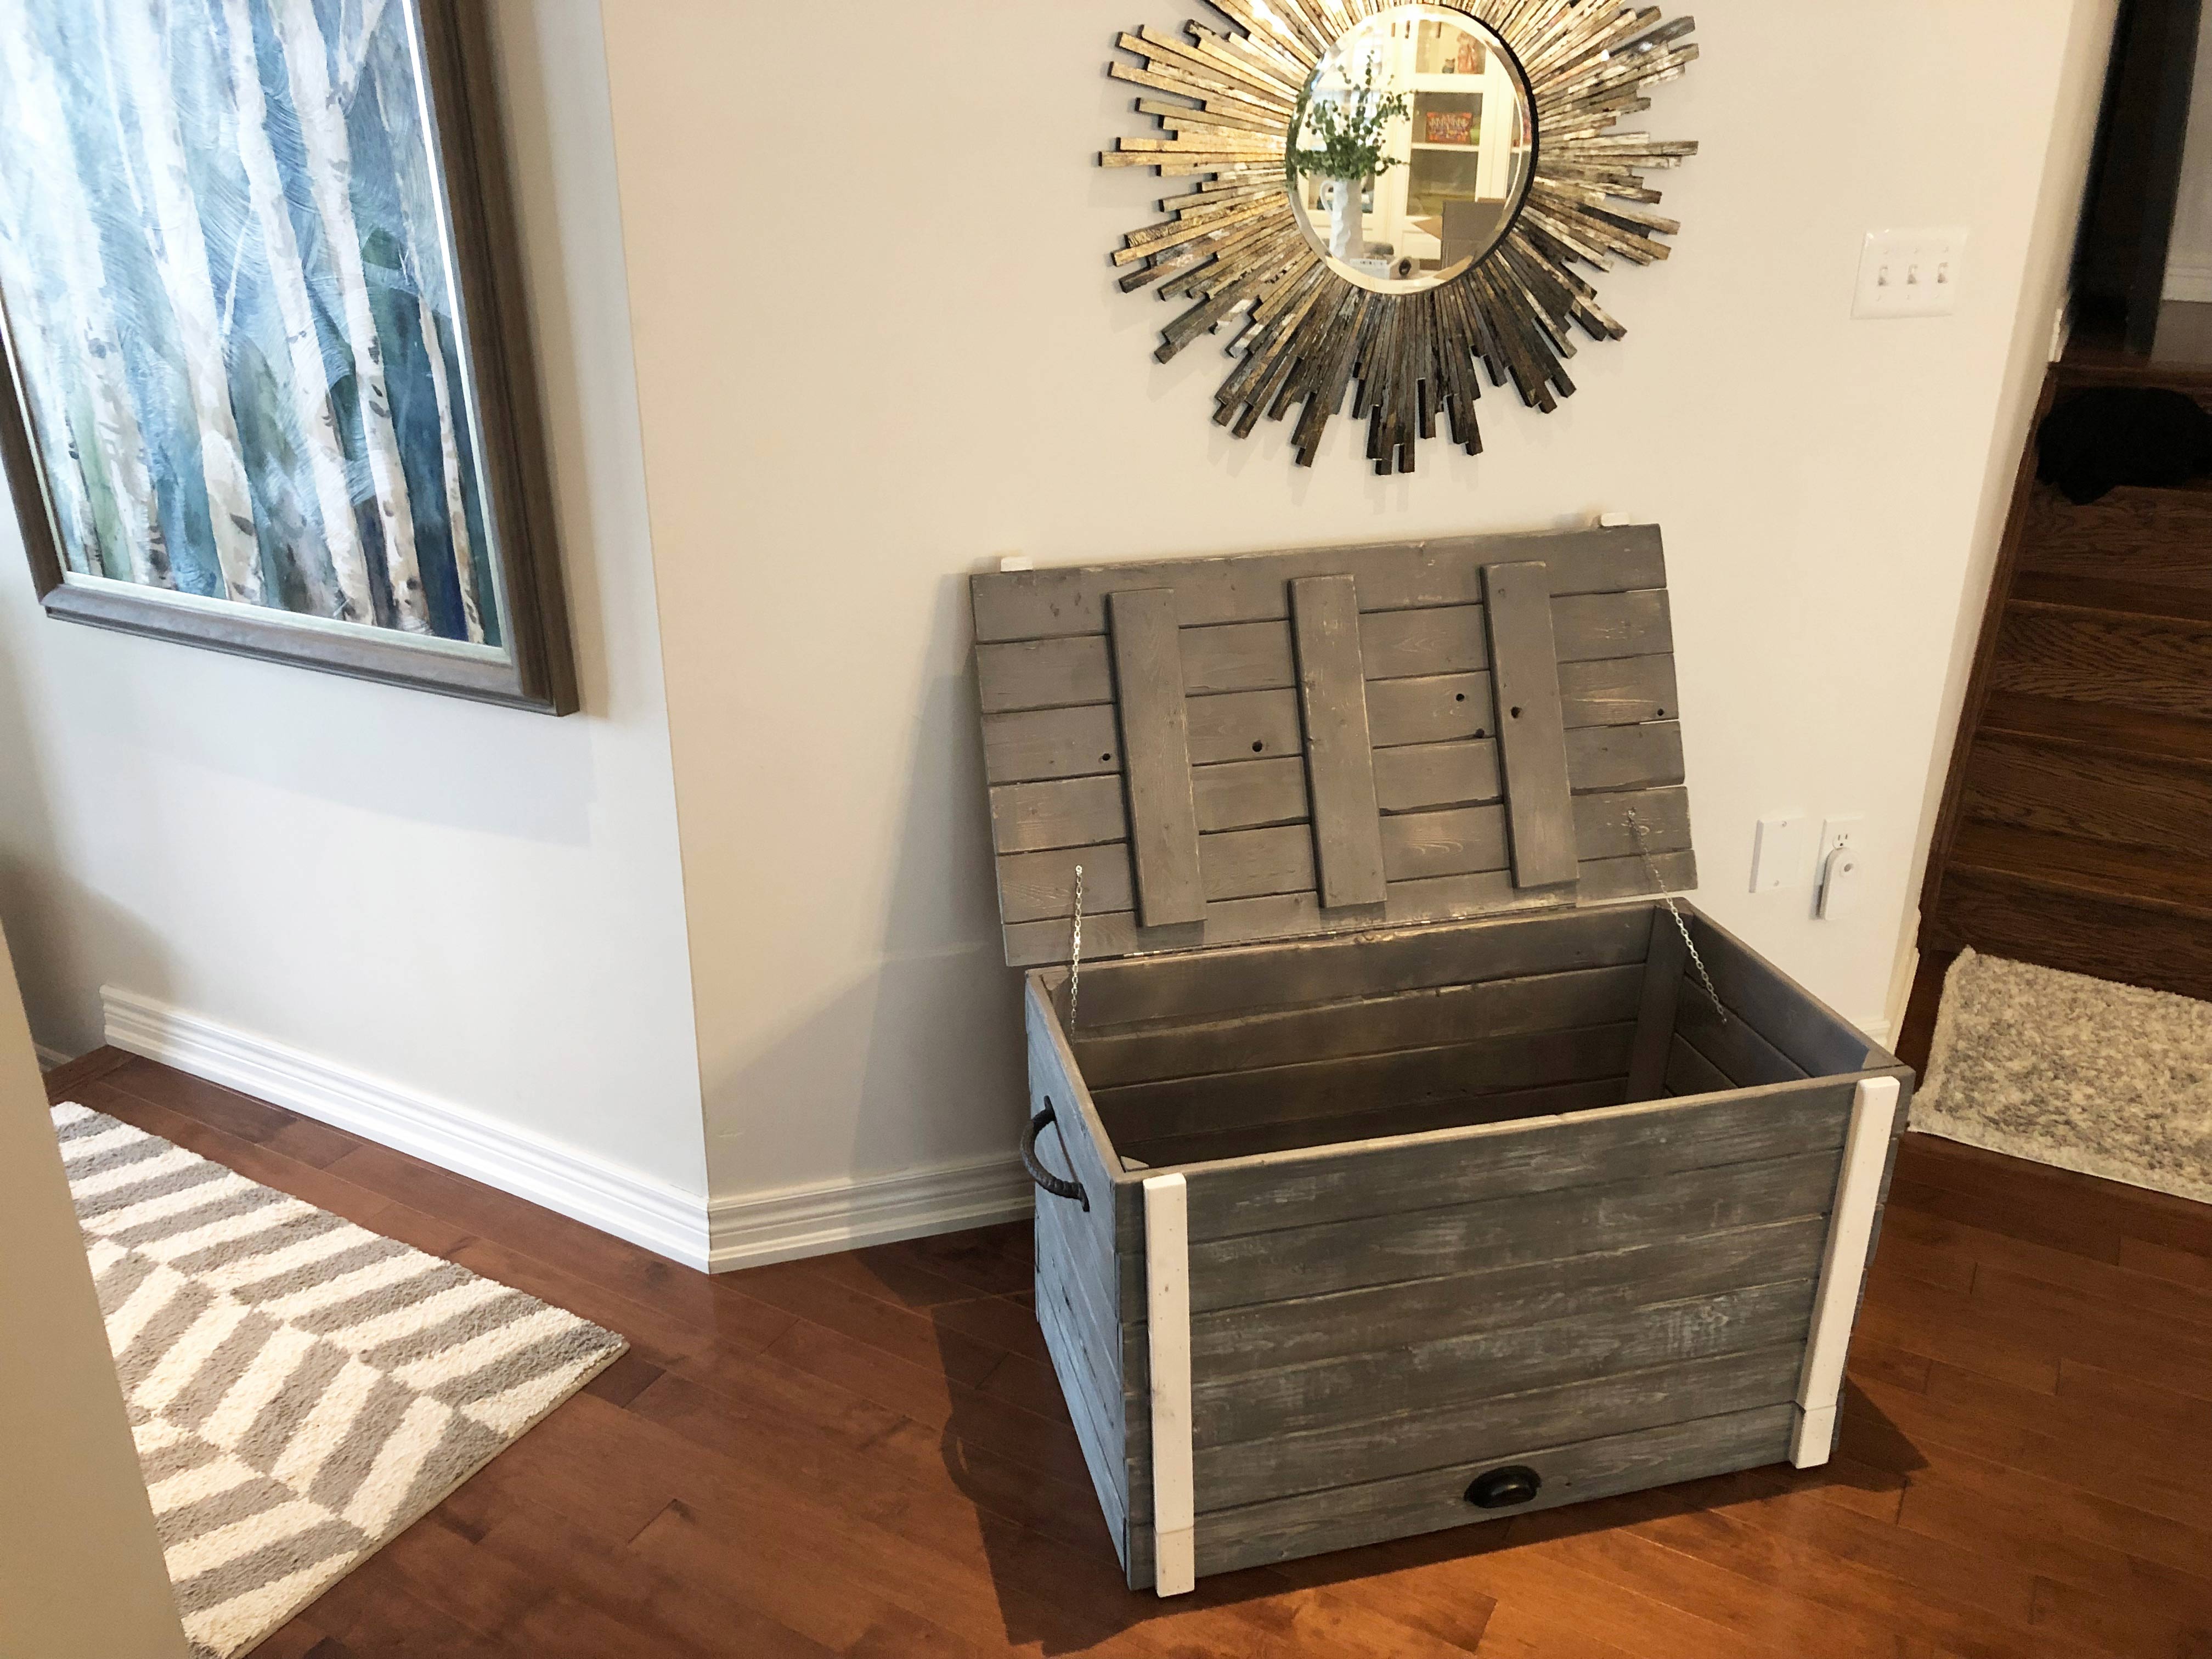
Building the Lid
Step 7: Assemble lid by gluing the long boards together, length-wise. Attach the short boards to the bottom of the lid for added support.Step 8: Attach piano hinge to back.
Final Touches
Step 9: Sand entire box.
Step 10: Apply Varathane Ultimate Wood Stain in Carbon Grey as per instructions on can. For a distressed look, lightly apply Varathane Ultimate Wood Stain in Linen White.
Step 11: Apply Varathane Triple Thick One Coat Clear Finish - Interior to entire box to protect and seal. Don’t forget to either remove/use Painter’s Tape to protect the handle.
Visit Rust-Oleum Canada, The Stump Shop, M Inspired Living and Remarkable Woodworks on Instagram for more tips and inspiration!
#We_Wood
Other Materials:
- 12 – 1x4 Boards
- 2 – 2x2 Boards
- 1 – 5/8” Sheet of Plywood
- 2 – LEGO Trays
- Table Saw
- Mitre Saw
- Sandpaper: grits 150
- Brad Nail Gun
- 1 ½" Brad Nails
- Tape Measure
- Wood Glue
- Safety Goggles
- Respirator
- 24” Piano Hinge
- ½” Screws
- Handles (optional)
Discover More Projects
Locate a Rust-Oleum Retailer